Even if you don’t have kids yet, you are bound to find the need to purchase toys for your nephews, nieces, the son or daughter of a good friend, etc. Nothing beats the joy of seeing the pleasure etched on a kid’s face upon receiving a new toy, no matter how cheap or expensive it is.
This is probably the reason why the global toy market was estimated to be valued at more than $84 billion as of 2012. Twenty billion is attributed to the US market. Some of the leading toy manufacturers in the world are:
In 2011, the average amount spent on toys per child in the US was $309. But what if you are a household full of kids and you would like to ply them with toys for them to play with? Would you need to spend hundreds of dollars on a regular basis? One idea to save money on kids’ toys is to pool together all the toys that they have and divide them into two groups.
The first set can be played with for a couple of weeks, then you can bring out the second set afterwards. The time away from the second set of toys will make them look and feel brand new again, so they will not be bored playing with the same set of toys over and over again.
Parents can also do a toy swapping party, where they can trade still usable toys with other couples with kids. Kids will hardly notice if the toys are not brand new, as long as they’ve never seen and played with the items before. Better yet, go for a do-it-yourself solution when it comes to toy making.
There are plenty of toys that almost anyone can easily make using basic household items. Aside from the fact that kids will love playing with these DIY toys, you can easily supply them with a slew of new toys without breaking the bank.
11 DIY Toys Anyone Can Make
Let’s get started. Here are eleven easy DIY toys that anyone can make for the cutest, most precious kids in their lives:
1. Bubble Wand/Shooter
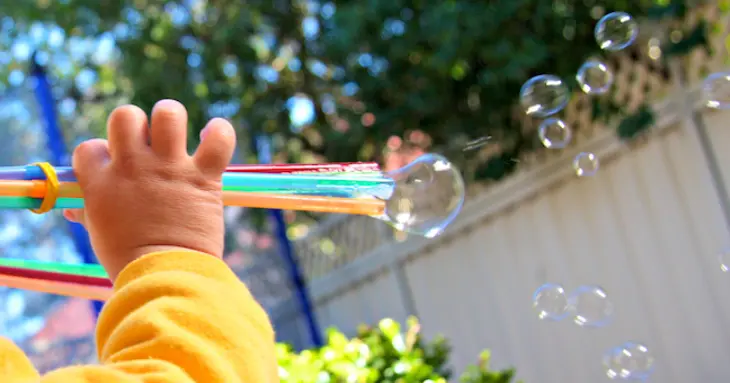
For this, you would need straws, rubber bands, baby bath solution and water. For the bubbles solution, simply mix one part baby bath with one part water. Mix these two liquids in a jar, then shake vigorously.
For the bubble shooter or bubble wand, put together five straws of the same size in a circle – then tie using a rubber band. The kids can dip the bubble shooter onto the bubble solution, then start shooting bubbles with every breath. Such fun!
2. Cardboard Hopscotch
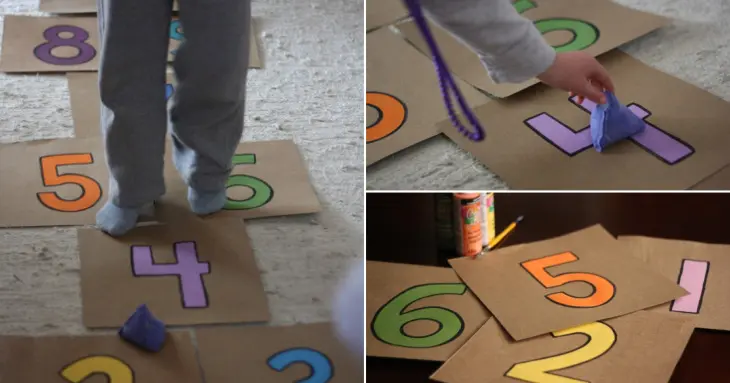
Via Happy Hooligans
This DIY toy is perfect for indoor playing. You can also use recyclable materials from inside your home so you won’t have to spend anything. Start by saving up those big pizza boxes or the cardboard containers of your favorite cereal brand.
Use the inside panels of the boxes to create 12” x 12” squares. Cut nine squares of the same sizes and paint them with huge numbers from 1 to 9. Then, cut a large semi-circle board which you can place on top of the hopscotch. Arrange the cardboard pieces similar to how you would draw a hopscotch board outdoors, then get your kids to hop and play the game indoors.
3. DIY Bouncy Ball
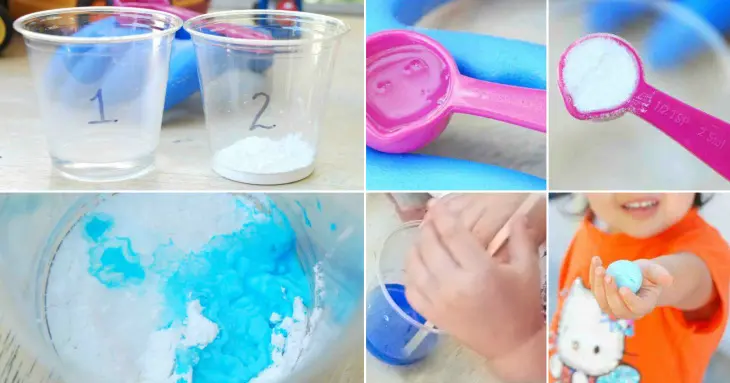
Another DIY toy that anyone can make is a recipe for a bouncy ball. The ball actually bounces, although if you are making this toy with kids, make sure to supervise them because you need to use Borax which is not edible. You can buy Borax in the laundry detergent section of supermarkets. For this bouncy ball recipe, you would only need half a teaspoon.
Here are the rest of the directions:
- Place two clear plastic cups on the table, labelling them 1 and 2 or A and B.
- In the first cup, pour water and borax. Stir until the powder is dissolved.
- In the second cup, pour one tablespoon of glue, some food coloring, and half a teaspoon of the mixture from cup 1 into cup 2.
- After about fifteen seconds, stir the ingredients together on cup 2.
- As soon as you find it difficult to stir the mixture, scoop it out of the cup and roll it into a ball. If you want to have a bigger bouncy ball, simply double the ingredients. You can either leave it as is or cover the mixture with felt for safer handling of the kids.
4. DIY Water Blob

Via HomemadeToast
If you have a front lawn or a backyard, you can make a DIY water blob which would provide hours of entertainment for the kids. All you need is plastic sheeting called painter’s plastic, an iron, ironing board, parchment paper and some duct tape. The typical size of the plastic roll is 10’ x 25’. Roll out the plastic sheet then fold it in half.
Seal the edges of the plastic together by putting the plastic inside a folded piece of parchment, then ironing on top of it. This prevents the plastic from being burnt while also sealing the edges. Make sure that you are not letting the iron touch the plastic, because the melted plastic will make a big mess on your iron. After sealing all the edges, lay the plastic outdoors where there are no sharp objects on the ground that could possibly tear the material.
Cut a short slit on one corner of the plastic where you can fit a hose. Prop up the corner so the water won’t spill, then fill up the water blob with water. Seal off the open hole with some duct tape, and let the kids start to play.
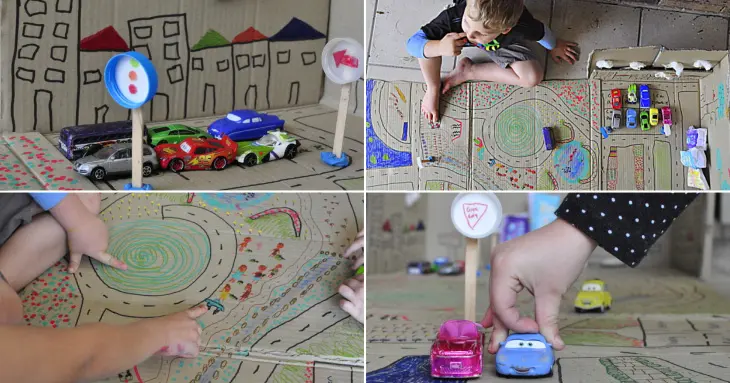
5. DIY Road Signs
Via Be A Fun Mum
If you have a son who is obsessed with toy cars, create DIY road signs using some wooden clothespins, cardboard, permanent markers and bright-colored dot stickers. Color the clothespins with black acrylic paint and let them dry. Using a permanent marker and the dot stickers, you can create signs on the cardboard which indicate road names, the Stop sign, the triangular traffic signs, and traffic lights.
You can either use a laminator or simply use a thick stock cardboard paper so that they can easily stand up on their own once they are propped up on the clothespins. Place the DIY road signs on a makeshift map, and have your son play with a miniature street using his toy cars.
6. Foam Bath Toys
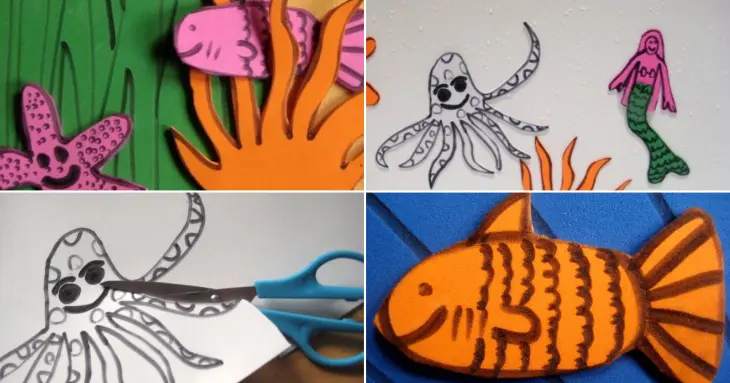
For this, all you need is a pack of foam craft sheets in different colors. Using permanent marker, daw aqua-themed pictures on the foam like starfish, octopus, shells, fish, mermaids, etc. Cut out the edges of the foam. Come bath time, the kids can play with the foam characters which, when wet, will easily stick to the side of the bathroom wall or the bathtub.
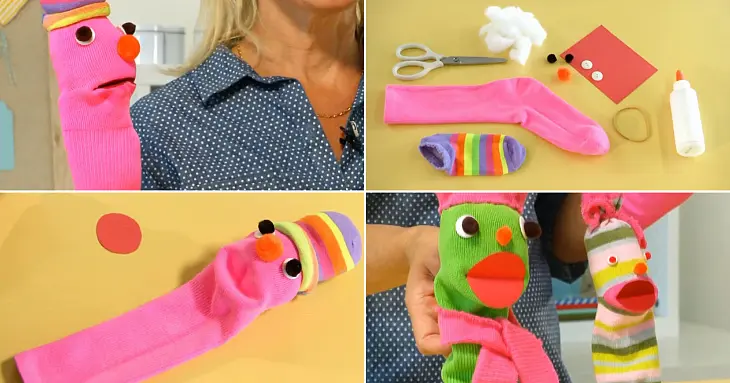
7. Hand Puppets
Via Parents
If you have old pairs of socks, you can draw eyes or paste moving eyes on the front to turn them into hand puppets. Glue on a nose, a mouth and tie up the two sides together to form ears. Have the kids create conversations with the puppets or act out scenes from plays.
8. Hula Hoop Hideout
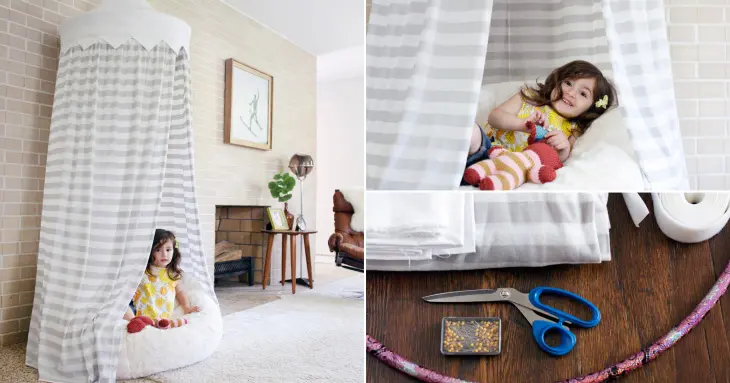
Via A Beautiful Mess
Another DIY toy that kids of all ages would love is a hula hoop hideout. Purchase a few hula hoops from the dollar store. bring out some old sheets, cushions, blankets, ribbon, and rope.
All you have to do is pin the top edge of a blanket to the hula hoop and use a twin or strings to hang it over a tree branch outside your home. Allow the edges of the blanket hang over the circular edge of the hula hoop, similar to how you would hang curtains on a canopy bed. Place a picnic blanket and some cushions at the bottom of the fort that you just built, then let the kids have fun in their new outdoor fort.
9. Homemade Play Dough Recipe
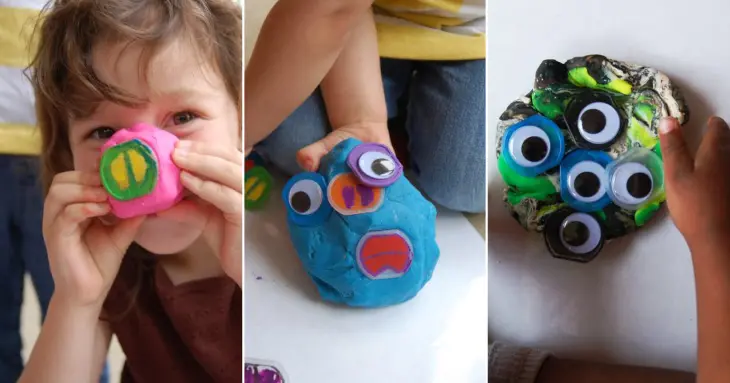
When you go online, you are bound to find plenty of recipes which are an alternate to the popular Play-Doh clay. There’s a basic four-minute clay recipe, a natural clay recipe, or one where you will use rainbow glitters for a salt dough.
Check out these steps on how you can make a homemade play dough or clay using household materials:
- Mix two cups of all-purpose flour, two tablespoons cream of tartar, and two tablespoons of vegetable oil in a large mixing bowl.
- You can use food coloring and add up to 1.5 cups of boiling water to the dry ingredients. Be careful in adding the boiling water, and add the liquid in increments.
- Continuously stir until the mixture becomes a sticky dough.
- If you want to clay to have some shine, add a few drops of glycerin.
- Let the finished dough cool. Vigorously knead until it’s not sticky anymore and you have reached a clay-like consistency.
There are also homemade clay recipes online for molding clay that hardens, so that whatever sculpture your little artist comes up with can be made into an actual toy that they can play with.
10. Magnetic Alphabet Board

Via Mama Miss
This one’s easy. Use an old oil drip pan or purchase one from a superstore. Use a high-gloss spray paint in white, which you can use to turn the oil drip pan into a magnetic alphabet board. After the paint has dried, you can hang it on a wall and have the kids stick alphabet flash cards or magnetic letters on the magnetic board for them to learn and play with.
11. Toy Wooden Blocks
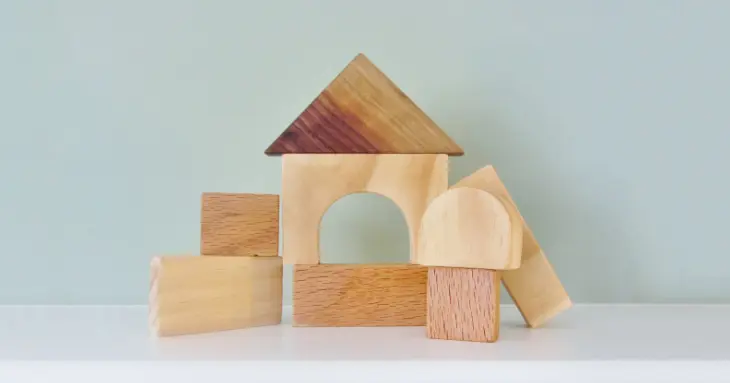
Via Crafts.tutsplus
Toys should let kids use their imagination, and old school toys like wooden blocks encourage just that.
If you have a knack for working with wood, you can turn them into wooden blocks and different shapes so that the kids can build castles, design bridges and pyramids, or create entire cities! Pine is as good an option as any.
Start by cutting 2” x 4” and 2” x 2” blocks of wood. Once you have the desired shapes, saw and sand the wooden blocks. You can finish them off using baby-safe paint, or glue sturdy patterned paper onto the surface.
These DIY toys are not just easy to do, but also oh-so-fun to play with, so get started on them right now!