If you are interested in impressing your guests, you’ve come to the right place! These are the best pinecone DIYs you can think of and they are very easy to make, so check them out:
2. Pinecone Tree
3. Snowy Candle Jars
4. Bow Ornament
5. Name Card Holders
6. Really Cool Centerpiece
7. Frosty Pinecones
9. Pinecone Chandelier
10. Window Focal Point
11. Wise Owls
12. Candlelight Ornament
13. Pinecone Turkey
14. Pinecone Mouse
16. Pinecone Fantasy
17. Picture-Frame Ornament
18. Stair Decoration
19. Present Wrap
20. Bird Feeder
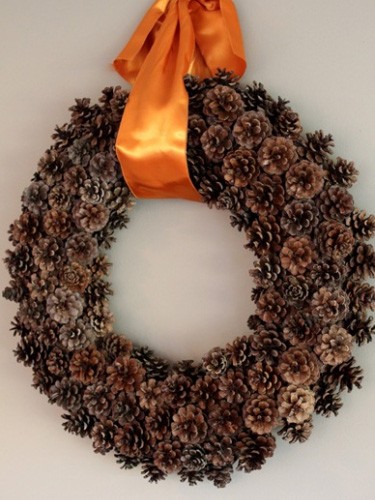
1. A Great Wreath
Wreaths are the way to go no matter the season, but Thanksgiving and Christmas without a wreath is something pretty much unheard of!
Start by picking as many pinecones as you can, then give them a good clean (sink them into a bucket of water for a few minutes).
You will need pinecones, a styrofoam wreath, hot glue and a ribbon.
Use the hot gun to glue the pinecones to your styrofoam wreath starting from the outer edge and continuing towards the inner circle. Wait an hour for the glue to dry and move on to your final step, which is adding a nice big ribbon in the color of your choice!
See the entire tutorial on justagirlblog.com.
justagirlblog.com
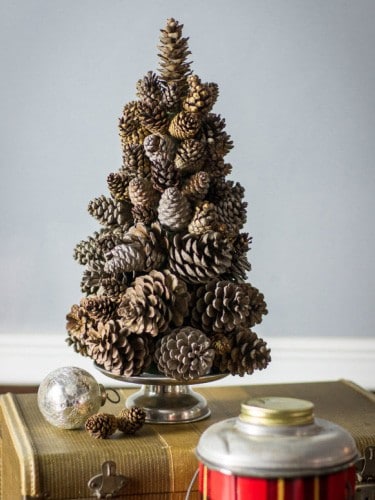
2. Pinecone Tree
If you really like Christmas trees but you’re afraid your guests will disapprove, how about putting together a Thanksgiving tree made of pinecones?
Start by purchasing foam cone (preferably a dark color, like black or brown, just in case the foam can be seen through your pinecones) and barbecue skewers. Then, glue your pinecones to your skewers and stab the foam with them, starting from the bottom.
Make sure to leave as fewer empty spaces as possible! Also, if your tree is unbalanced, glue the bottom of the tree onto an old plate. What do you think about it? You can decorate with tiny pearls, sequins and rhinestones if you want! You can make this your centerpiece if you want.
Read the entire tutorial at hgtvgardens.com!
hgtvgardens.com
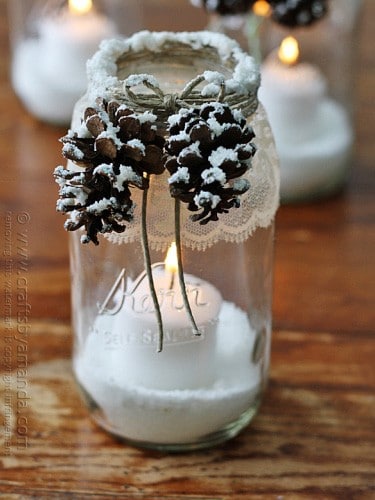
3. Snowy Candle Jars
If Christmas is your favorite time of the year, you will love this tutorial!
Materials: snow texture paint from the craft store, pinecones, twine, craft glue, mason jars and candles.
Start by tying to pinecones to the neck of every mason jar using the twine. When you are done, glue the pinecones to the twine and jar to make sure they stay in place. Now, move on to the snow texture paint. Use a small paintbrush and apply the paint where the snow would normally fall: on the crease of your pinecones, the jar’s edge and so on. Place the candle inside the mason jar, light it up and taa daa! You are all finished, so enjoy it!
The entire article is at craftsbyamanda.com!
craftsbyamanda.com
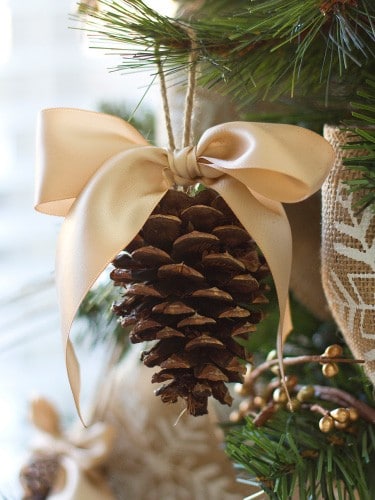
4. Bow Ornament
Prepare yourself to try the easiest pinecone DIY so far!
You will need: pinecones, bows, glue and twine. Cut 4-inch pieces of twine and tie the edges together. Glue the knot to the back of a pinecone, then glue a bow on and you are done in less than 30 seconds!
You can make your own bows using strips of fabric (silk, burlap, cotton etc.).
You can either use these ornaments to decorate Your Christmas tree or sew them onto a curtain, for example! Feel free to add some sparkle (glitter or metallic spray paint, beads or rhinestones) to your cones, bows or both!
This and many more ideas, on makeit-loveit.com!
makeit-loveit.com
5. Name Card Holders
If you are organizing a big Thanksgiving dinner this year, you may want to show off a little by creating your own name card holders to tell people where to sit at the table.
Here’s what you’ll need: Elmer’s glue, glitter, pinecones, cardstock.
Start by mixing the glue with the glitter and running your pinecones through this mixture until they turn glittery.
When they are all dried off, you can place your name cards on top. You don’t have to cut the pinecone to make room for it, but you certainly could, just make sure to make a very small incision in the top leaf.
More details on blog.simplelittledetails.com!

blog.simplelittledetails.com
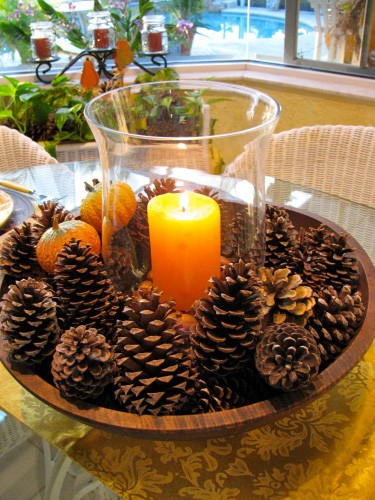
6. Really Cool Centerpiece
Here’s a great way to impress your guests: create a really cool Thanksgiving table centerpiece.
For this, you will need a footed bowl, pinecones, floral foam, floral wire and artificial sprigs of berries.
Start by placing the foam inside your bowl. Then, attach the wire to your pinecones to make them look like flowers.
When you are done, stab the foam with them and the berry branches until it looks nice and clean. Make sure to use enough pinecones, so no empty spaces are allowed! You can also glue a colorful ribbon on the side of your bowl if you want.
See the entire tutorial at allyou.com.

allyou.com
7. Frosty pinecones
Prepare yourself for a little frosting!
Use pinecones, craft glue, Epsom salt and thin carpentry nails. Start by putting a nail in each pinecone but only halfway.
Tie a ribbon or piece of twine around the neck and bring in the salt. But first, apply glue on the bottom of your pinecones (the one that will be up) and sprinkle some Epsom salt on it.
Let them dry and put them up for people to enjoy their really cool look! As long as you have salt and glue at home, this DIY project will not cost you a dime, which is pretty cool!
This and more awesomely clever ideas are on myclevernest.com!

myclevernest.com
8. Opulent Garland
This is probably our favorite DIY so far because it literally costs you nothing, unless you have no twine in your house whatsoever.
So for this project you will need pinecones (about 75 of them) and a ball of twine.
Start by wrapping a piece of twine around the base of each pinecone and making a knot.
Leave enough space to put a finger through the two knots and make another knot. When you are done, pull a long piece of twine through all these tiny holes and call it a day. To mix things up a little bit, you can glue some glitter on your pinecones and add some colorful ribbons here and there.
The entire tutorial can be found on designsponge.com.
designsponge.com
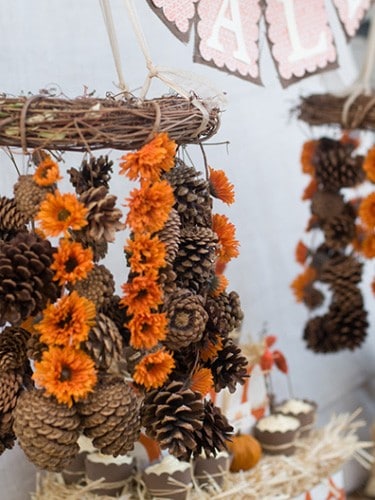
9. pinecone Chandelier
Now this is a conversation starter, people!
You will need: 14’’ grapevine wreath, ribbon for hanging, string, glue gun, scissors, pinecones, wire. Cut four equally long pieces of ribbon and tie them to your wreath to help you hang the chandelier.
Then, tie your pinecones, flowers and other ornaments on different pieces of string that you will then tie onto your wreath.
You can also add some white Christmas lights to make everything come to life. Also, you can spray paint your pinecones to give them more depth and a great color.
See the whole process at passyandparties.com.
passyandparties.com
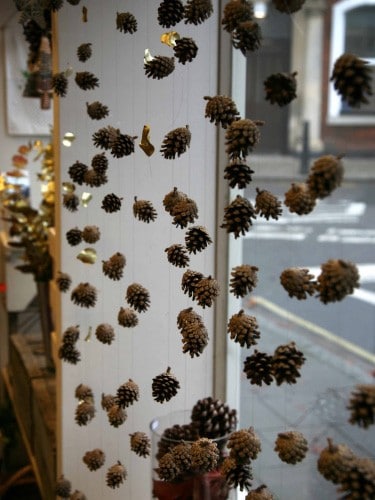
10. Window Focal Point
This idea is so great you’ll wonder how come you never thought of it!
Here’s what to do: gather your pinecones, put them on individual pieces of string and then attach them to the top edge of your window frame to make it look like a pinecone-made curtain.
You can paint your pinecones, leave them as they are or put glitter and pearls on them. The choice is yours.
Also, you can use ribbons instead of string and add a few leaves here and there.
And the good news is that this project is probably not going to cost you anything!
Get more inspiration on pinterest.com!
flowershopstories.blogspot.co.uk
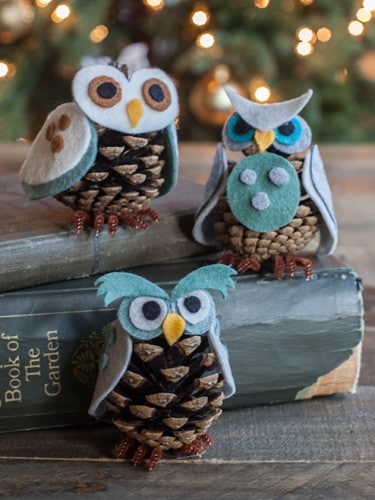
11. Wise Owls
Owls are just great, aren’t they? Plus, you can make a few of them by combining felt and pinecones!
Start by cropping faces, beaks, wings and eyes (better than the plastic wiggly ones!) out of felt fabric and then glue each one of these pieces onto your pinecone to make it look like an owl.
You may want to use different shades of felt so that no detail goes unnoticed! When your owls are ready, you can add some pipe cleaner claws to each one of them and place them next to a stack of books for more appeal.
Is this something you would try at home? We are in love with this idea!
To see the whole process, visit liagriffith.com!
liagriffith.com
12. Candlelight Ornament
Here’s a great way to draw attention to your candles!
Here’s what to do: grab a glass bowl or a mason jar, fill it with pinecones and add a few candles in the middle. You can also add cranberry branches and leaves, if you want. Another idea would be to place you candles inside mason jars and glue your pinecones onto the base of each glass jar.
The light will shine through and really make an impression on your guests! Of course, you can find pinecone-shaped candles, but why waste money when you can create this? Don’t forget to add glitter, rhinestones and faux pearls to make everything look more expensive.
Check out pinterest.com for more ideas!
ritamay-days.blogspot.ro
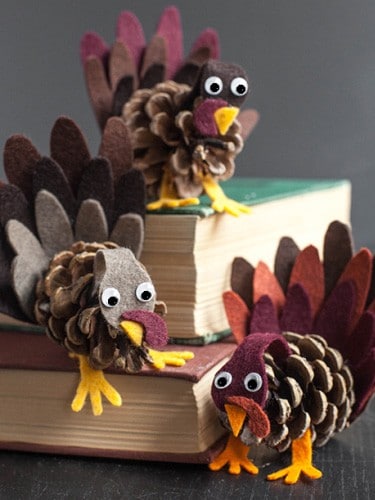
13. Pinecone Turkey
This craft is great for young families with small children at home.
You can start by picking pinecones from a place in your area and then gather the following items: felt (3-4 different colors), pinecones and craft glue, plus a set of plastic eyes.
Cut different groups of feathers out of different felt colors, making them one shorter than the other. then, glue them to the back of the pinecone starting with the shortest one and ending with the tallest. To make the head, draw a circle and a long tube to make the neck. Add a beak, the eyes and glue everything to the body. You’ll get a cool-looking turkey!
See the entire tutorial at liagriffith.com.
liagriffith.com
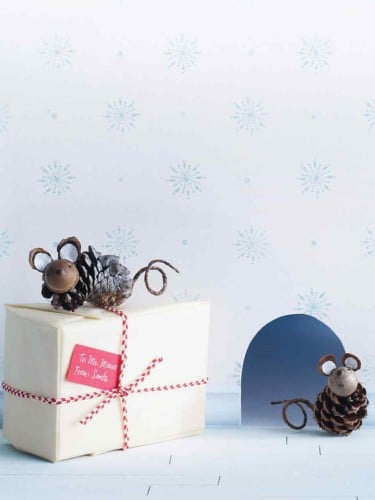
14. pinecone Mouse
For this very cute DIY, you will need 2 very big pinecone scales to make the ears, acrylic paint (white and brown), a few paintbrushes, twine for the tail, a cool-looking pinecone, craft glue and 1 acorn to make the head, but remove the cap.
You can start by painting the acorn, gluing the ears and then attach the head to the body.
Gently attach the tail, add finishing touches (eyes, nose, whiskers, if you want) and you are done. You can use this cute mouse to entertain your little ones on a regular day or add it to your Christmas collection, next to a Doctor Seuss book. You can add glitter if you want, but don’t go overboard.
More instructions on marthastewart.com!
marthastewart.com
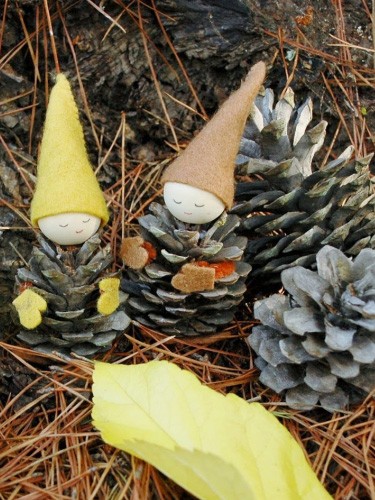
15. Garden Gnomes
Interested in making your garden more magical? If the answer is yes, you will need pinecones, 1-inch wooden beads with holes, felt for the hats and feet, twine to make the hands, craft glue and black and red markers.
Glue or sew the wooden bead on top of your pinecone and draw eyes and mouths. Draw a circle on a piece of felt, cut it out and cross cut it into 4 equal parts. Each part will make a great hat. Sew the edges or glue them, add a pair of heart-shaped feet and you are all finished!
Place your favorite gnomes next to your plants and ask your friends to find them! They make great gifts, as well!
The entire tutorial is at webloomhere.blogspot.com!
webloomhere.blogspot.com
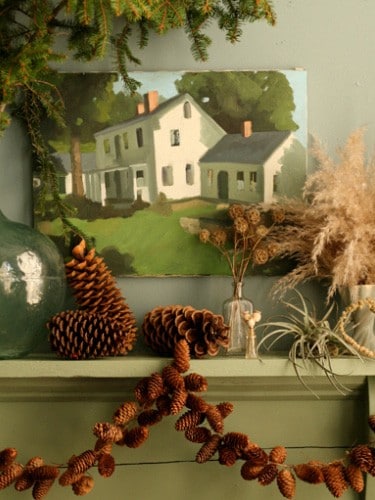
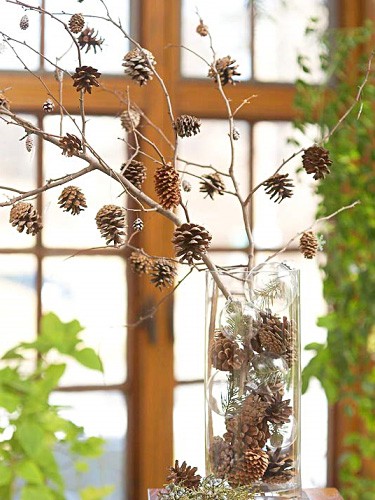
16. Pinecone Fantasy
For this ornament, you will only need a few things that you can find around the house, so the total cost is almost zero.
Start by picking a few tree branches and glue them together or just use a big branch from the beginning, add a few pinecones, a vase or a mason jar, some twine and craft glue.
Place your branch into a vase and start gluing a piece of twine to each pinecone, then glue everything to the branch to make it look like the pinecones are hanging from it.
This is a great ornament for any season, but it could prove very useful during fall!
pinterest.com
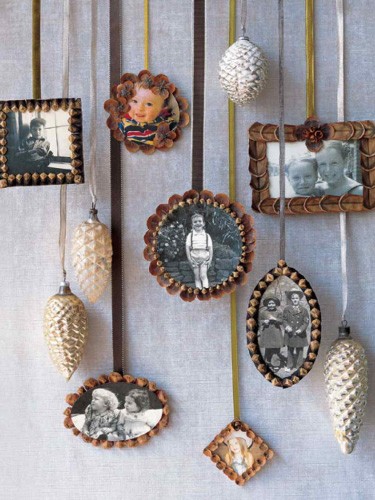
17. Picture-Frame Ornament
You will need pinecones, photos, floral clippers, glue, card stock, a marker or a pencil, a round shape to help you later on, colored paper and ribbon in the color of your choice.
Start by using the round shape to draw circles on the cards and photos. Cut out both the picture and the cards and move on to the pinecones. Remove every pinecone petal using the floral clippers. Glue every petal to the edge of the round-shaped card and then glue the family picture on top of it to create a flower-looking picture.
You can use these decorations anywhere in the house or hang them on the wall as normal pictures.
The entire tutorial is at marthastewart.com!
marthastewart.com
18. Stair Decoration
Here’s a great way to bring cheer to your staircase!
You will need pinecones, glue and twine. For each pinecone, cut an 8-inch piece of string, and glue one of the edges to the back of your pinecone. Run the other edge across the banister rail and then glue it back to the other edge to make the pinecone hang from the banister rail. You can sprinkle some glitter on your pinecones if you want. This idea is great for Thanksgiving, Christmas, a fall wedding or just as a great winter ornament!
Another idea would be to add plastic pearls and rhinestones to your pinecones to make them more elegant.
For a step-by-step tutorial, visit familycircle.com!

familycircle.com
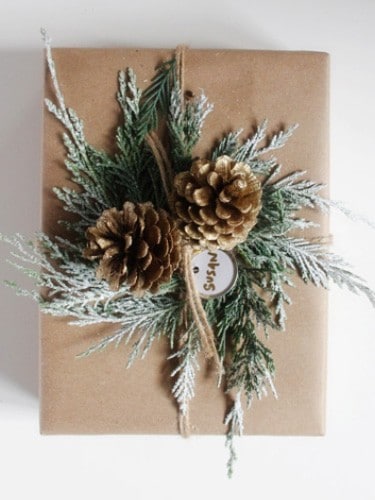
19. Present Wrap
This is the easiest and cutest way to wrap a present. All you need is some brown paper, a few pinecones, twine, craft glue and pine tree branches. Wrap your present in brown paper; tie it using the twine and then move on to the decoration.
Firstly, glue the branches onto the top of your present, let the glue dry and then glue the pinecones on. You can use two or three pinecones per present, depending on how big the present is.
Now place your gift under the Christmas tree and wait for Santa to take a bite out of those cookies!
The final result should look similar to the one on homedepot.com!
homedepot.com
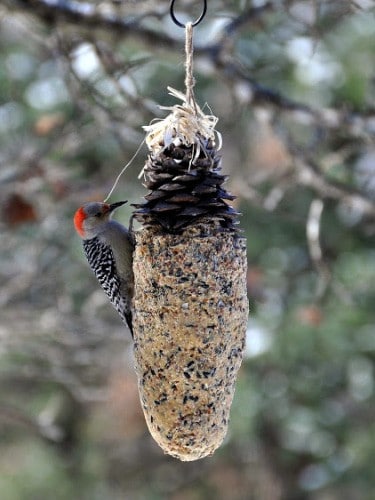
20. Bird Feeder
This DIY project is more of a cooking recipe than an ornament idea, but it’s still very interesting!
You will need to purchase: 2 cups of pork fat, 2 cups of peanut butter, 6 cups cornmeal, flour and birdseed. In a pan, melt the lard and peanut butter together and then add the other ingredients.
Now take a long and sturdy pinecone and press the mixture against it until you obtain a corn on the cob-looking bird feeder. Hang it onto a branch and wait for your feathered friends to enjoy it!
You can use popsicle sticks to stab the birdfeeder and create a lovely seating area for the birds!
This tutorial can be found at rebeccasbirdgardensblog.blogspot.com!
rebeccasbirdgardensblog.blogspot.com
Which one of these DIYs is your favorite? Do you have pinecones in your area? How do you plan on spending your Thanksgiving?
Pin it for later: